Welcome to the Blazor Simple AI Single Page App, the AI App that responds to questions instantly using Microsoft Azure OpenAI Services. This document explains the .NET project I developed which I have pushed to my public Github repository which is available here: https://github.com/tejinderrai/public/tree/main/BlazorSimpleAI.
If you wish you to download the PDF version of this blog post, it is available here.
Technologies
Blazor Simple AI is made up of the following technologies:
- Microsoft .NET Blazor (.NET 6.0 LTS release)
- Microsoft Azure.AI.OpenAI .NET Library
- Microsoft Azure AI Services – OpenAI
It’s that simple!
Why Blazor?
Blazor is simply amazing, I have been developing Blazor projects for over four years. There has been great demand for Blazor over the past few years and as a component framework and use of C# this is exactly what I need to develop solutions and concepts super fast!
What Blazor Simple AI Does?
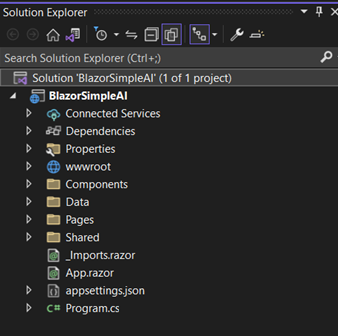
Blazor Simple AI is a Blazor server side single page app which has a single page and a single component. The razor page has two basic user interface controls, a textbox and a submit button for a user to enter the question for Azure OpenAI. The component “AzureOpenAIChat.razor”, has a single parameter which receives the question from the main index page. When the parameter is received by the child component, the component has OnParametersSetAsync() method which then retrieves the appsettings.json values in relation to the Azure OpenAI service AI endpoint, Azure OpenAI key and the deployment name which has the associated model, which was deployed with Azure AI Studio, then send the text to the Azure OpenAI service and retrieves and displays the response.
Core Blazor Template Changes
There have been some basic changes to the basic Blazor layout to accommodate the project. These are as follows:
- The sidebar has been removed from the MainLayout.razor page
- A new Index.razor.css style sheet has been added to centre the UI components on the page
- A new Components folder has been added to the project
- A new component named AzureOpenAIChat.razor has been added into the Components folder
- A new configuration section has been added to appsettings.json to include the configuration required for the project to interact with the Azure OpenAI service.
- The title and main element have had text changes to represent the project name and description
Steps to Deploy Azure Open AI
- Create an Azure Resource Group
- Deploy the Azure OpenAI service in the resource group, see: How-to: Create and deploy an Azure OpenAI Service resource – Azure OpenAI | Microsoft Learn
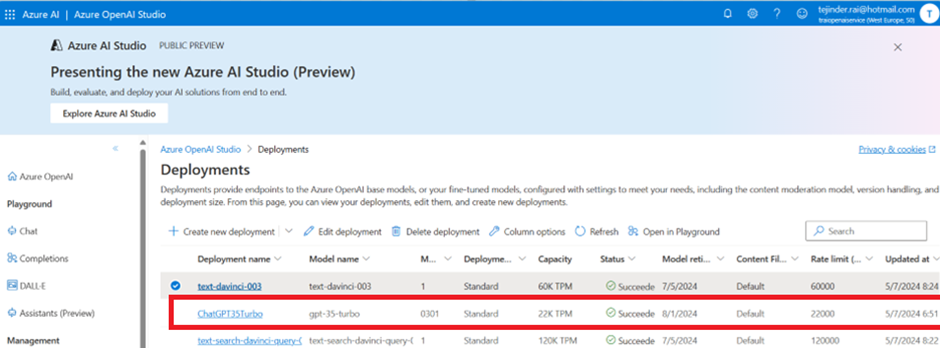
- Manage Deployments in Azure AI Studio and create a deployment using the gpt-35-turbo model
- Update the appsettings.json with the settings
"AzureAIConfig": {
    "OpenAIEndpoint": "https://[You Azure OpenAI Service].openai.azure.com/",
    "OpenAIKeyCredential": "[Your Azure Open AI Key]",
    "OpenAIDeploymentName": "[Your Azure Open AI Deployment Name]"
    "RetroResponse": "true or false"
}- Build the project and ask Azure OpenAI anything you like.
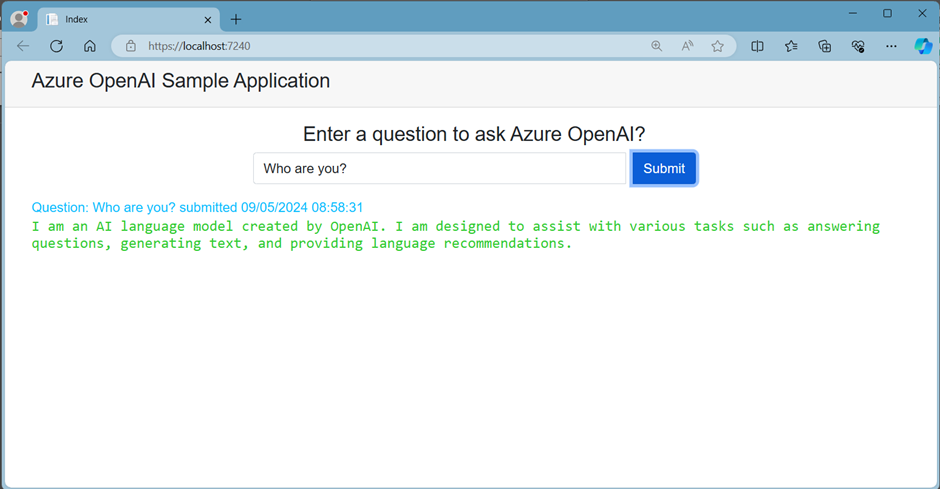
The UI
The landing page.
Sample Questions and Responses
Question 1
Who founded Microsoft?

Question 2
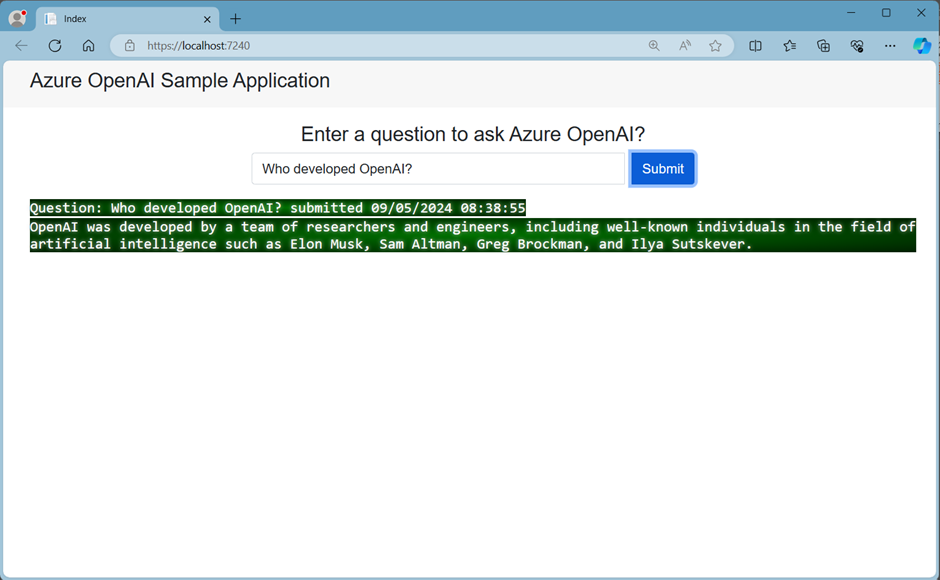
Who developed OpenAI?
Question 3
How can I develop a Blazor App?

Basic CSS
The AzureOpenAIChat.razor component has a basic CSS style sheet which allows the deployment to have a retro style response or a basic response text visualization option. If the app setting below is set to true, you will get the retro response as per the sample above. For a standard non-retro style response, you can set the value to false, example below.
"AzureAIConfig": {
     "RetroResponse": "false"
}